Red Baskets, a vintage quilt

31 05 2013

I know I have written this a thousand times, but I just LOVE this quilt.  Perhaps the key is that it is RED.

I found this quilt top on a trip to the quilt festival in Houston in 1995, and the sales tag indicated that it was made in Ponca City, Oklahoma.  Barbara Brackman’s Encyclopedia calls this block Unnamed Basket. This seems too vague for such a powerful form, but then I couldn’t come up with anything more creative either, so I kept it simple.03-Dague_4-2013med

Red Baskets                     69″ x 82″           Photography by Sibila Savage

Since I loved this top so much, I sent it off to Quilting Plus for hand quilting right away.  They did a wonderful job.

Here are some detail photos showing the great vintage fabrics.  Click on any photo for and enlarged view.

03-Dague_4-2013_3

03-Dague_4-2013_2

Red Baskets was featured in Mary Mashuta’s book Cotton Candy Quilts, which also includes a pattern for the block.

I also made a copy of this quilt for Mary’s book.  I used the foundation piecing technique, making the blocks in a manner similar to Fan Block construction.  For my small quilt, I wanted to use as many original vintage solids as I could find in my collection, as well as some of my favorite vintage fabrics and feed sacks.  This piece was both hand and machine quilted.

01-scan-Dague_2-2012medRainbow Baskets, 2000           33.5″ x 34″           Photography by Sibila Savage

01-scan-Dague_2-2012med_3

Rainbow Baskets, detail

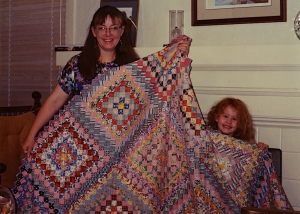
And while I was photographing the top for my journal, Maggie got in the picture, too.

Maggie_and_quilt_3


Starshine: foundation piecing

24 05 2013

Having taken the beginner class in foundation piecing** from Jane Hall and Dixie Haywood in Houston, I jumped at the chance to study with foundation-piecer extraordinaire Karen Stone when she came to EBHQ in the late 90’s to speak and teach classes.  My Starshine quilt is the product of that class and is made from Karen’s Lady Liberty pattern.

Karen has a wonderful technique for identifying the different areas of the block and then distributing the different colors within these areas.  In addition, she taught us the intricacies of using foundations to make sewing the curved seams easier.

For this quilt, I used the same color palette as my Triad quilt (seen here), adding purple as an extra color.  And note how intense these colors seem when the quilt is photographed on a black background.

010DagueStarshine, 1999               55.5″ x 55.5″             Photography by Sibila Savage

Here is a detail of four blocks put together.

010Dague_2Starshine, detail

What surprises me about this quilt today is its lack of quilting.  I know I was having trouble at this time trying to figure out how to machine quilt these creations of mine that have soooooo many different fabrics in them.  What color thread is best for the quilting?  Will you even see the quilting on these blocks?  It seems I took the easy way out and quilted the whole thing in the ditch.  Might do it differently today.

This quilt is another example of my discounting my work merely because it was made using someone else’s pattern.  I loved making it, and I love the product, but I folded it up and put it aside, writing it off as a so-so work, and not thinking much more about.  It was not until I was showing some of my quilts to a group of non-quilters that I had a change of heart.  One of the group pulled this quilt off the storage shelf, opened it up,  and raved about it, so I looked at it again with new eyes.  It’s really kinda cool.

________________

P.S. . . .

A couple more of the fabric postcards I’m working on, not finished yet.  Afraid I’m becoming obsessed.

photo-39

______________________________

**Jane and Dixie always call their work “foundation piecing” to distinguish it from English paper piecing (EPP), which is a method  done by hand.


Fabric postcards and a quilt

17 05 2013

I finally found a large enough block of time to work on a group of fabric postcards for the EBHQ Voices in Cloth 2014 quilt show.   Here’s my favorite one from the recent group.

This vintage martini fabric is perfect for a postcard that was inspired by some relatives of mine   !!!

martinisThese cards are lots of fun to make.  Since the design area is compact, the work needs to be simple—a whole new challenge.  As I work through this process and find other ones that I feel are successful, I will post them here.

And now, here’s another vintage quilt story. . . .

The Sunflower Quilt

06-Dague_4-2013med

Let me say right away that I do not know for sure why I love this quilt.  I puzzle over it every time I hang it up for display.  But I did fall in love with this sunflower quilt top when I purchased it the first time I went to the quilt show in Houston (Hi, Edy!!).

Because this quilt seems unusually busy for its time, I wonder why it never got quilted.  Perhaps the maker had one of those what-was-I-thinking moments when she saw the overall effect of the background fabric she had chosen.  The sunflowers fade in and out of that fabric, sometimes making parts of them disappear.  I think this quilt’s background fabrics is one of the reasons I like it so much.

Here are details of two of the blocks, showing how wonderfully complex they are.  Note how different the same light orange fabric looks in each of these blocks.

06-Dague_4-2013_206-Dague_4-2013_3

__________________________________________________________________________

Having decided to have this top hand-quilted, I was so happy to have it returned from the quilter, until I opened the box.  The quilting was irregular, and not the usual high quality that I was accustomed to seeing.

When I asked about my options, knowing that I wanted it quilted properly, I was told that they offered to  re-quilt it if I sent it back, meaning, of course, that I would have to take out the first stitching if I wanted it replaced.  My quilt mini-group at the time volunteered to help, and we held a unique, day-long event–an Unquilting Bee.  (Lily, did you help with this?)  Now quilted beautifully, the Sunflower Quilt is a fine addition to my collection.

One more item, to follow up on the Postage Stamp quilt post of two weeks ago:

I did not crop myself out of the picture of the newly finished quilt and my daughter Maggie;  I just wasn’t in that shot, so I dug around and found another view, posted here just for the fun of it.  Twenty years—-wow.

QuiltGirls


The Laundry Girl

10 05 2013

Following the example of vintage squares as seen  in the most recent post, The Laundry Girl is also full of fabulous squares, but is a much more recent creation.

I wanted to experiment with the medallion format for quilts, which focuses on  a central motif, surrounded by different borders, usually made from varying sewing techniques.  When I started working in this form with a few fellow quilters, we found that adding these additional borders was not as simple as we had originally anticipated.

For this quilt, I cut apart an unused, vintage laundry bag found in an antique store and used  it for the center of the quilt.  The image and the writing were printed on the muslin, as was the pattern for hand embroidery.  I completed the embroidery, and chose the fabrics for the first border.  All the fabrics are from my vintage collection.

As soon as I put on the third border, the blue floral with patchworked corners, my original ideas for the remainder of the quilt no longer worked.  This medallion technique has been wonderfully challenging every step of the way, and it’s so much fun that I now have at least two new medallions in progress currently.

01-Dague_4-2013med

The Laundry Girl, 2013                57″ x 63.5″                 Photography by Sibila Savage

Here is a close-up of the charming laundress.

LaundryGirlDetail

The Laundry Girl, detail 1

Here is a close view of some of these wonderful vintage fabrics.  I think these are great fun to look at.

LaundryGirlDetail2The Laundry Girl, detail 2

In the interest of full disclosure, I must confess that there is one fabric in Detail 2 above that is not a vintage fabric.  Can you find it???   (Hint: it appears twice.)


Postage Stamp Quilt

3 05 2013

Finally got around to getting photographs of some more of the quilts/quilt tops I have collected.  Here is one of the very early ones.  Now, as I see the photos of these collected quilts all in a digital file, I begin to see how much many of these works influenced my journey as an artist.

04-Dague_4-2013medPostage Stamp Quilt           70.5″ x 87.5″       Photography by Sibila Savage

The year is 1991.  I had first seen this quilt top in the display window of Sharks, a used clothing store on Telegraph Avenue in Berkeley.  It was part of a Christmas display, and was tagged “Not For Sale.”  In May, the quilt top was on the store’s shelf of linens for sale, and I jumped at it, probably overpaying at $85.  Didn’t seem to matter, since I thought it was marvelous.  According to my journal, I “ran home with it and put it on the wall to stare at it.”

Then began an exercise that I can hardly begin to comprehend now:  I started hand quilting it, using an Aunt Grace fabric for the backing and 100% cotton batting.  This quilting took at least two years, and  I was approaching the time when I would begin machine quilting, having taken a beginning class at Cotton Patch, a fabric store in Lafayette.

See the detail below for the tedious way I decided to quilt this beauty.  Perhaps this labor was why I was warming to the idea of machine quilting.

PostageStampDetailPostage Stamp, detail

And, as if hand quilting wasn’t enough for me to take on, I decided to bind this quilt without squaring it up (and using coarse feed sack fabric) JUST BECAUSE I KNEW HOW TO DO IT.  A true what-was-I-thinking moment ! ! !  It took forever.

Actually, the choices were either whack off the entire outside row of triangles, or hand sew a new row of squares all the way around that I would be willing to cut in half, or bind it like this. This whole project was finished in 1993.

Scan

Headless Susan and daughter Maggie (age 4), posing with the finished quilt

Click here to see how I used this same pattern, using larger squares and putting the patches on point.